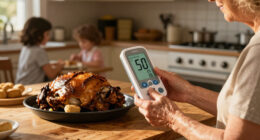

Choose and set up a medical alert system that lets the wearer call for help at home or away from home. This guide is for the wearer, a family member, or a caregiver who is comparing services and can help complete setup. You will identify the right coverage, confirm who responds to an alert, configure the device, and test it. Allow 1-3 hours for comparison and setup, plus shipping time if you order a device.

Turn quiet afternoons into listening time
- Thousands of audiobooks, podcasts and originals
- Listen on your phone, tablet or Echo — also offline
- Cancel anytime

SecuLife Medical Alert Pendant for Seniors with GPS, Fall Detection, and Two-Way Calling
- ✔ Connectivity: 4G LTE cellular
- ✔ Alert features: SOS, automatic fall detection, GPS tracking, geofencing
- ✔ Calling: Two-way speakerphone; listing describes calls to preselected contacts

Caregiver Pager Call Button for Elderly at Home with App Notifications
- ✔ Radio: 433 MHz
- ✔ Maximum range: Up to 656 feet / 200 m in open space, as stated
- ✔ Connectivity: 2.4 GHz Wi-Fi for app push notifications

App-Controlled Home Alert System with Waterproof Wristband and LED Receiver
- ✔ Connectivity: 2.4 GHz Wi-Fi app connection plus wireless receiver signal
- ✔ Maximum range: Up to 300 feet, as stated
- ✔ Receiver: Audible alarm with 1–6 LED number display, per title
Difficulty: Beginner | Time: 1-3 hours, plus delivery time
What You’ll Need
Tools & Materials:
- A phone or computer with internet access
- The wearer’s address, phone number, and emergency contact details
- A list of relevant medical conditions, allergies, and medications
- A payment method for any service or equipment fees
Knowledge:
- Whether the wearer needs help only at home or also while away
- Who can answer calls and reach the wearer if an alert is sent
In an immediate medical emergency, call your local emergency number directly. A medical alert service is not a replacement for emergency care. Ask the wearer about their preferences and explain how the device works before buying or activating it.
SecuLife Medical Alert Pendant for Seniors with GPS, Fall Detection, and Two-Way Calling
When a wearer needs an alert option away from home, SecuLife covers more of the emergency path than either home pager in this roundup. The listing describes automatic fall detection, GPS location tracking, geofence alerts, and two-way 4G LTE calling to preselected family contacts. That means family can potentially locate the wearer and speak through the pendant, rather than relying on a receiver in the house or a person already within hearing distance.That broader coverage comes with a more involved setup. The advertised fall alerts, tracking, speakerphone minutes, and related services require a monthly subscription, and the pendant needs regular charging: the listing says up to six days under a specified tracking interval, while its specifications state an average battery life of five days. Those figures are not a guarantee for every use pattern. By comparison, the two home systems avoid a required monthly subscription for their core pager alerts, but they cannot match SecuLife’s listed GPS and cellular calling. The product is a better fit for families who want location-aware contact than for those seeking a simple, subscription-free button in a single building.Water resistance is another practical advantage: the product is listed as IP67 and designed for 24/7 wear. Still, a wearable device only helps if the person keeps it charged and wears it consistently. Buyers should also verify cellular service where the pendant will be used and understand exactly how automatic fall alerts reach contacts. It is the most complete option here for mobility, but it asks families to maintain both a service plan and a charging routine.
Pros:
- Lists automatic fall detection with SOS calls and notifications to selected contacts.
- GPS tracking and geofence alerts support location awareness away from home.
- Two-way cellular calling lets the wearer communicate through the pendant.
- IP67 water resistance is intended to support wearing it in wet conditions.
Cons:
- A monthly subscription is required for the advertised safety services.
- The wearer must keep the pendant charged; stated battery estimates vary by listing context and use.
- Cellular availability and alert behavior should be confirmed for the intended coverage area.
Best for: Older adults who move between home and community settings and whose family wants GPS, two-way calls, and automatic fall alerts.
Not ideal for: Buyers who want no recurring service, a passive home-only alert, or a device that does not need regular charging.
Bottom line: Choose SecuLife when mobile reach, location sharing, and fall alerts matter more than avoiding a subscription.
“Choose SecuLife when mobile reach, location sharing, and fall alerts matter more than avoiding a subscription.”
Caregiver Pager Call Button for Elderly at Home with App Notifications
Among the two home-focused picks, this caregiver pager makes the clearest case for covering a larger house: it claims a 433 MHz radio range of up to 656 feet (200 m) in open space. That is a stated maximum, not a promise that the button will reach through every wall, floor, or source of interference. The set includes a receiver plus a waterproof call button and a watch-style SOS button, so caregivers can place coverage around common help-needed areas and the wearer has more than one way to trigger an alert.Pressing either button sounds the receiver and, when connected, sends an app notification over 2.4 GHz Wi-Fi. This keeps it simpler than SecuLife: there is no described cellular pendant subscription for basic app push alerts, and the device is designed for an at-home caregiver to respond. But that simplicity marks its limits. It does not provide automatic fall detection, GPS, two-way voice, or a monitoring center, and the product description explicitly says it is for home assistance rather than medical monitoring. The dual-channel Wi-Fi model also claims a wireless backup during internet outages, a distinction this listing does not make, while it lists a shorter maximum range.For a person who lives with family or has a caregiver close enough to hear the receiver and act on an app alert, the longer stated open-area reach may be useful. It is less suitable when the wearer is often alone, travels beyond the home, or needs someone to assess an alert remotely. The listing says phone calls and SMS may require a paid app service, so we would confirm which notifications are included before depending on them. This is a home call system with a notable range claim, not a replacement for a monitored mobile alert service.
Pros:
- Claims up to 656 feet of 433 MHz range in open space.
- Includes both a waterproof call button and a watch-style SOS button.
- Receiver alarm and app push alerts can notify nearby caregivers through different channels.
- Basic app push alerts are described without a required monthly subscription.
Cons:
- The open-area range can be reduced by walls, layout, interference, or placement.
- No automatic fall detection, GPS, two-way calling, or medical monitoring is described.
- Phone calls and SMS may require a paid app service.
Best for: Households seeking a button-and-receiver alert for a larger home, with a caregiver nearby and app push notifications.
Not ideal for: People who need mobile coverage, automatic fall detection, two-way voice, or professional monitoring.
Bottom line: Pick this pager for a nearby-caregiver household that values its longer stated range over mobile or medical monitoring features.
“Pick this pager for a nearby-caregiver household that values its longer stated range over mobile or medical monitoring features.”
App-Controlled Home Alert System with Waterproof Wristband and LED Receiver
This system stands apart from the other home pager by describing two alert paths: Wi-Fi app notifications and a wireless signal to the receiver. The listing says the wireless signal can keep the pager connected during internet outages and travel through walls and doors up to 300 feet. That could suit a household that wants an audible in-home alarm alongside phone notifications, though the stated reach is shorter than the 656-foot open-area claim for the other home system and real-world range will depend on the building.The receiver’s LED number display is meant to help caregivers identify which button was pressed, and the set includes two call buttons plus a waterproof wrist remote. That can be useful where more than one person needs to alert the caregiver or where a wrist-worn button is easier to reach than a pendant. Only the hand-worn remote is described as waterproof, so buyers should not assume the receiver or other button can be worn in the shower. The system also requires 2.4 GHz Wi-Fi for app setup; the included radio channel does not turn it into a mobile system.Compared with the 656-foot pager, this model emphasizes caregiver identification and a stated backup alert channel, while the other home pager claims greater open-area reach and explicitly says basic app push notifications need no subscription. Here, additional phone SMS notifications require a subscription. Like both home options, it relies on a button press and a caregiver who can respond; it does not describe automatic fall detection, GPS, two-way calls, or a staffed response center. Its best use is coordinated in-home alerting, especially when numbered alerts help distinguish who needs assistance, rather than protection for someone living or traveling alone.
Pros:
- Describes a wireless receiver link alongside Wi-Fi app notifications.
- Listing says the receiver can continue to alert over the wireless channel during internet outages.
- LED number display is intended to identify which button sent the alert.
- Includes a waterproof wrist remote for use while showering.
Cons:
- Maximum stated range is 300 feet, shorter than the other home’s 656-foot open-area claim.
- Only the wrist remote is described as waterproof.
- Additional phone SMS notifications require a subscription, and 2.4 GHz Wi-Fi is needed for app features.
Best for: Homes that want an audible receiver plus app alerts, a shower-safe wrist remote, and numbered alerts to help distinguish callers.
Not ideal for: People needing out-of-home coverage, automatic fall detection, a monitoring center, or alerts that do not depend on 2.4 GHz Wi-Fi.
Bottom line: Choose this system for numbered, dual-channel alerts inside a home, provided its shorter stated range and app conditions fit the setup.
“Choose this system for numbered, dual-channel alerts inside a home, provided its shorter stated range and app conditions fit the setup.”
As an Amazon Associate we earn from qualifying purchases.
Before You Start
Compare the full cost, including equipment, activation, shipping, monthly service, optional fall detection, and cancellation fees. Confirm whether the system uses a landline, a cellular connection, or a paired mobile phone. Ask about coverage where the wearer spends time, battery life, water resistance, and what happens if the device loses signal or power. Read the provider’s emergency response and cancellation terms before enrolling.
Decide who should be contacted and in what order. Get each person’s agreement and current phone number. If nobody can reliably check on the wearer, ask the provider how its monitoring center handles an unanswered call.
Step-by-Step Instructions
Step 1: List the wearer’s needs and routine
Write down where the wearer needs coverage: at home, in the yard, on errands, or while traveling. Note whether they can reach a phone after a fall, whether they use a mobility aid, and whether they are comfortable speaking with an operator. Include any hearing, speech, memory, or dexterity needs that could affect device use.
Use this list to compare options. A home base unit may fit someone who stays near home; a mobile unit may suit someone who goes out alone. If the wearer may be unable to press a button after falling, ask about automatic fall detection and its limits.
Tip: Fall detection can miss some falls or send an alert when no fall occurred. Treat it as an added feature, not a substitute for pressing the help button.
Check: You have a written list of locations, daily routines, and accessibility needs to use when comparing plans.
Step 2: Compare providers and response options
Contact at least two providers and ask each the same questions: What is the total monthly and one-time cost? Is there a contract? What cellular network does a mobile unit use? Can the wearer use the device in every location they need? Is the help button waterproof? How long does the battery last, and how is it charged? Can the service call emergency contacts, emergency services, or both?
Ask how the monitoring center confirms the wearer’s location, handles a dropped call, and responds if nobody answers. Request the cancellation process and return instructions in writing. Choose the service whose coverage, response process, and total cost match the wearer’s needs.
Tip: Do not assume a mobile device works wherever a phone works. Ask the provider to check the specific home address and common destinations.
Check: You can explain the plan’s coverage, costs, response process, and cancellation terms before you enroll.
Step 3: Choose the device and enroll
Select the device type and optional features with the wearer. Provide accurate contact details, the service address, entry instructions, and emergency contacts. Share relevant medical information only through the provider’s approved process, and check that names and phone numbers are entered correctly.
Ask whether the device is leased or owned, what must be returned if service ends, and whether the account includes a backup battery or power-failure notice. Save the agreement, account number, provider support number, and return instructions somewhere the caregiver can find them.
Tip: Tell emergency contacts that they have been listed, describe what the provider may ask them to do, and confirm they can be reached at the listed numbers.
Check: The account is active or has a confirmed activation date, and the wearer’s address and contact list are accurate.
Step 4: Install or charge the equipment
Follow the provider’s setup instructions. For a home base unit, place it where the wearer spends time and can reach it, near a suitable power outlet and phone connection if required. Keep its microphone and speaker clear. For a mobile unit, charge it fully and carry it in the recommended way, such as on its lanyard or clipped to clothing.
Show the wearer how to press the help button and, if applicable, how to cancel an accidental alert. Keep the base unit connected to power and avoid placing it behind furniture or in a closed cabinet. Note the charging routine and any low-battery signal.
Tip: If the wearer may fall in the bathroom, confirm that the device is water-resistant before taking it into the shower or bath. Some pendants are shower-safe but not suitable for submersion.
Check: The unit powers on, the wearable is charged, and the wearer can reach and operate the button.
Step 5: Test the alert with the provider
Use the provider’s stated test procedure. If the instructions are unclear, call customer support first and ask how to run a test without dispatching emergency services. Press the help button only when the provider says it is safe to do so. When an operator answers, say that you are testing the system and confirm that they can hear the wearer.
Ask the operator to verify the account address and emergency contacts. For a mobile unit, test from the locations the provider recommends, including a usual outdoor area if possible. Do not assume that a light or sound alone confirms that the monitoring center received the alert.
Tip: Never place a test call to the local emergency number unless the provider or emergency dispatcher instructs you to do so.
Check: The monitoring center confirms it received the test, can communicate with the wearer, and has the correct response information.
Step 6: Practice the emergency routine
Have the wearer practice pressing the button and speaking a short message: their name, location, and the kind of help they need. Explain that they should stay near the device if it is safe and answer the operator’s questions. If the wearer cannot speak, explain that the service may use the account details and its response procedure to decide what to do.
Tell household members and caregivers where the equipment is, how to recognize an alert, and how to contact the provider. Put the provider’s support number and the local emergency number in an easy-to-find place.
Tip: Keep instructions brief and visible. A long written procedure may be difficult to follow during an emergency.
Check: The wearer can demonstrate how to request help, and the caregiver knows whom to call about the device or account.
Step 7: Maintain the device and account
Follow the provider’s schedule for charging, battery checks, and system tests. Check that the wearable is being used as intended and that the base unit remains connected. Update the provider promptly if the wearer moves, changes phone numbers, adds an emergency contact, or changes a door entry code.
Review the plan after a change in health, routine, or travel needs. Before changing providers, confirm the new service is active and tested, then follow the old provider’s cancellation and equipment-return instructions.
Tip: Set a recurring reminder for charging and any provider-recommended tests. Replace or repair damaged equipment through the provider.
Check: The equipment is charged and connected, account details are current, and the wearer still knows how to use the system.
Common Mistakes to Avoid
- Choosing a home-only system when the wearer regularly goes out alone. — Map the wearer’s routine first and confirm that the selected device works at home and at common destinations.
- Assuming fall detection guarantees help after every fall. — Ask about detection limits and false alerts, and teach the wearer to press the button whenever they can.
- Entering outdated contact details or an incorrect service address. — Read the details back during enrollment and check them with the provider during the test call.
- Skipping the monitoring-center test because the device powers on. — Complete the provider’s test procedure and get confirmation that an operator received the alert.
Troubleshooting
Problem: The operator does not answer after the test button is pressed.
Solution: Follow the provider’s test instructions; do not repeat the alert unless directed. Call customer support using the published number and ask them to check device activation, signal, and account status. Do not rely on the system until the provider confirms it is working.
Problem: A mobile device shows weak signal or loses connection.
Solution: Move to an open area and check the provider’s coverage guidance. Ask support to test the device at the exact location. If coverage remains unreliable, ask about another network or a different system type.
Problem: The wearable does not hold a charge.
Solution: Check that it is seated correctly in its charger and that the outlet works. Review the charging indicator and the provider’s battery instructions. Contact support for a battery or device replacement if it still loses charge quickly.
Problem: An accidental alert reaches the monitoring center.
Solution: Stay on the line and tell the operator it was accidental; do not assume the alert can be canceled silently. Ask the provider how to prevent repeat accidental presses without making the button hard to reach.
What Success Looks Like
The system is enrolled with the correct address and reachable emergency contacts. The wearable is charged, accessible, and suited to the wearer’s routine. A test alert reached the monitoring center, an operator could communicate with the wearer, and the provider confirmed the response information. The wearer and caregiver can describe what to do when an alert is sent.
Next Steps
Keep the provider’s support number and account details accessible to the caregiver. Follow the provider’s charging and test schedule, and update the account whenever contact or location details change. Recheck coverage when the wearer’s routine changes or before travel. If the service no longer fits, arrange and test a replacement before canceling the active system.
Frequently Asked Questions
Should I choose a home system or a mobile system?
Choose based on where the wearer needs help. A home system covers the home within the provider’s stated range; a mobile system is designed for use away from home but depends on its network and location coverage. Ask the provider to check specific addresses and destinations.
No. Detection may not recognize every fall and can sometimes send a false alert. The wearer should press the button when able, even if the device also has automatic detection.
Can I test the system without calling emergency services?
Usually, providers have a test procedure that connects to their monitoring center. Call the provider first if instructions are unclear, and do not test by calling the local emergency number unless instructed.
What should I do if the wearer cannot speak during an alert?
Ask the provider how its operators respond to silence or a dropped call. Keep the account address and emergency contact details current, since the service may use them to decide what response is needed.
How often should I check or test the equipment?
Follow the schedule in the provider’s instructions. Charge the wearable as directed, watch for low-battery or connection alerts, and repeat a monitoring-center test after setup or account changes if the provider recommends it.